Placeholder Content Image

Coronation quiche? Not if the French have anything to say about it

<p dir="ltr">When the British royal family revealed Charles’ ‘Coronation Quiche’, the internet was sent into a frenzy. </p> <p dir="ltr">From concerns for the nation’s crippling egg crisis to complaints over the entirely uninspired choice, <a href="https://www.oversixty.co.nz/lifestyle/food-wine/king-charles-signature-coronation-dish-mercilessly-mocked">people had a lot to say</a>. </p> <p dir="ltr">And now, the French have chimed in, though their issue isn’t necessarily with the dish itself, but instead with its name. </p> <p dir="ltr">They claim that the celebratory dish has been given an incorrect label. The recipe for the Coronation Quiche - released by Buckingham Palace - calls for broad beans, tarragon, spinach, and absolutely no meat in line with Charles’ environmental concerns. The ingredients are considered by many to be traditionally English, although fresh tarragon is often included in various French dishes. </p> <p dir="ltr">But according to French quiche enthusiasts, there can only be one kind of quiche, and that’s the 'lorraine'. The dish is named after the northeastern Lorraine region that it comes from, and is made from shortcrust pastry, eggs and cream with nutmeg, and small bits of bacon.</p> <p dir="ltr">Although, to sidestep that particular issue, Twitter user @RebeccaCNReid used a little red, white, and very blue language to suggest an alternative name that comes close enough to ‘lorraine’ to get it over the line ...</p> <blockquote class="twitter-tweet"> <p dir="ltr" lang="en">what fucking idiot didn't call it quiche le reign? <a href="https://t.co/EFbCZ52UZN">https://t.co/EFbCZ52UZN</a></p> <p>— Rebecca Reid (@RebeccaCNReid) <a href="https://twitter.com/RebeccaCNReid/status/1648087895025041409?ref_src=twsrc%5Etfw">April 17, 2023</a></p></blockquote> <p dir="ltr">Evelyne Muller-Derveaux, president of the Quiche Lorraine Guild, explained to<em> The Times</em> that “they called it a quiche, but I would rather say it's a savoury tart.</p> <p dir="ltr">"When you say quiche, you automatically imply it is from the Lorraine region."</p> <p dir="ltr">Evelyne’s associate, Laurent Miltgen-Delinchamp had similar thoughts, quipping that, “I think it would have anyway better reflected the British spirit if they had called it a tart.”</p> <p dir="ltr">However, the two don’t intend on taking their particular gripes any further, and were even willing to admit that in France the term “quiche” is already quite misused. </p> <p dir="ltr">“Frankly,” Laurent said, “it shocks me less when Anglo-Saxons do that than when the French do it.”</p> <p dir="ltr">And as <em>The Times </em>reported, Evelyne took pride in knowing that the humble quiche had been elevated to such royal heights - even if it wasn’t exactly the most authentic. </p> <p dir="ltr">“I was surprised when I found out,” she admitted. “I said to myself, ‘this is a banal, common, popular dish, and to think that it is being served at a coronation’.”</p> <p dir="ltr">She went on to note that the first mention of a quiche - on record - dates all the way back to the reign of another Charles III: the 16th century’s Duke of Lorraine. </p> <p dir="ltr">And even then, they were a simpler dish enjoyed by those who weren’t rolling around in wealth, and consisted of whatever ingredients they happened to have around. </p> <p dir="ltr">Quite unlike the <a href="https://www.oversixty.co.nz/lifestyle/food-wine/coronation-quiche-anyone-you-ll-need-to-fork-out-a-38-here-are-cheaper-and-healthier-options">$38 grocery price tag</a> behind Charles’, it seems. </p> <p dir="ltr"><em>Images: Getty</em></p>

Food & Wine

Placeholder Content Image

Coronation Quiche anyone? You’ll need to fork out A$38. Here are cheaper and healthier options

<p>If you are a monarchist, or just enjoy the tradition of the royal family, you may have heard about the Coronation Quiche – made with spinach, broad beans and tarragon.</p> <p>The idea is for us to make it and share it with friends and family during the coronation celebrations in May. King Charles and Queen Consort Camilla have just shared a <a href="https://www.royal.uk/coronation-quiche-0">recipe</a>.</p> <blockquote class="twitter-tweet"> <p dir="ltr" lang="en">Introducing… Coronation Quiche!</p> <p>Chosen personally by Their Majesties, The King and The Queen Consort have shared a recipe in celebration of the upcoming <a href="https://twitter.com/hashtag/CoronationBigLunch?src=hash&amp;ref_src=twsrc%5Etfw">#CoronationBigLunch</a> taking place up and down the country. <a href="https://t.co/aVcw9tNarP">pic.twitter.com/aVcw9tNarP</a></p> <p>— The Royal Family (@RoyalFamily) <a href="https://twitter.com/RoyalFamily/status/1647917367798939648?ref_src=twsrc%5Etfw">April 17, 2023</a></p></blockquote> <p>As dietitians, we’re interested in the quiche’s nutritional value. So we analysed its contents and found that although it’s quite a healthy dish, we could make a healthier version. Spoiler alert: the original recipe contains lard (pork fat).</p> <p>We’ve also found we could make the quiche using cheaper or more easily available ingredients.</p> <h2>What exactly is a quiche?</h2> <p>Today, most people consider quiche a French dish that’s essentially a savoury pie. It typically consists of a pastry crust filled with a mixture of eggs, cream and cheese, plus various other ingredients such as veggies, meat and herbs. </p> <p>Quiche can be served hot or cold. You can have it for breakfast, lunch or dinner with salad or veggies.</p> <h2>How much does it cost?</h2> <p>Quiches are usually quite economical to make. Most of the basic ingredients are cheap, and you can adapt the fillings depending on what’s in the fridge or left over from recent meals.</p> <p>Let’s see if this applies to the Coronation Quiche. We split the costs into typical quantities you can buy at the shops (for instance, six eggs) and the costs to make the quiche (which only needs two eggs).</p> <p>If you make the quiche from scratch and have to buy the ingredients in quantities sold in the shops, this will cost you almost A$38. Although this may seem a lot, you’ll have some ingredients left over for another meal.</p> <p>So how much do the ingredients cost for one quiche? We worked it out at $12 for the entire quiche, or $2 a serve. Quite reasonable!</p> <h2>Can you make it even cheaper?</h2> <p>Busy lives and the rising cost of living are front of mind right now. So here are a few things you can do to save time and money when making a Coronation Quiche:</p> <ul> <li> <p>buy pre-made pastry. Keep any sheets you don’t use for the quiche in the freezer</p> </li> <li> <p>use <a href="https://theconversation.com/are-home-brand-foods-healthy-if-you-read-the-label-you-may-be-pleasantly-surprised-189445">home-brand products</a> where possible </p> </li> <li> <p>consider vegetable shortening as it is a little cheaper than lard</p> </li> <li> <p>buy vegetables in season and from a farmers’ market</p> </li> <li> <p>can’t find tarragon? Try seasonal and cheap herbs such as parsley, basil or rosemary</p> </li> <li> <p>can’t find broad beans? Try cheaper pulses such as edamame or cannellini beans.</p> </li> </ul> <h2>How nutritious is the Coronation Quiche?</h2> <p>We also looked at the Coronation Quiche’s nutritional profile. We expressed quantities for the whole quiche, and per serve.</p> <p><img src="https://oversixtydev.blob.core.windows.net/media/2023/04/quiche-nutrient.jpg" alt="" width="1280" height="720" /></p> <h2>The healthy … and the not so healthy</h2> <p>This quiche has high amounts of healthy protein and fibre that come from the broad beans and eggs. </p> <p>One serving of this quiche gives you about 18-25% of your daily protein and about 10% of your daily fibre requirements, which is great.</p> <p>But the quiche has high levels of saturated fat, mostly from its high amounts of lard, butter and cream.</p> <p>Saturated fat has been linked to an increased risk of <a href="https://www.cochranelibrary.com/cdsr/doi/10.1002/14651858.CD011737.pub3/full">cardiovascular events</a>, such as heart attacks and stroke, because it raises levels of LDL cholesterol (the bad kind of cholesterol). </p> <p>This LDL cholesterol can build up in the walls of arteries and form plaques, leading to arteries hardening over time and increasing the risk of heart attack and stroke. So, high amounts of saturated fats is something we want to avoid eating too much of, especially if we have cardiovascular disease. It’s also something we want to avoid if we’re trying to lose weight.</p> <p>For an average Aussie consuming roughly 9,000 kilojoules per day, the recommended maximum intake of saturated fat is about 24 grams. </p> <p>Just one serve of this quiche has about 17g of saturated fat, which means there’s not much wriggle room for other foods after you have a slice. </p> <p>You may be better off trying <a href="https://nomoneynotime.com.au/healthy-easy-recipes/clares-rolled-oats-quiche">this quiche</a> instead, as it has half the amount of saturated fat as the Coronation Quiche. You could even try a <a href="https://www.wellplated.com/crustless-quiche/">crustless quiche</a>.</p> <h2>4 ways to make a healthier quiche</h2> <p>Here are a few swaps to help make this recipe healthier:</p> <p>1. Use low-fat options. If you’re watching your weight and looking to reduce the kilojoules of the quiche, swap the full-fat cheddar cheese, milk and double cream to low-fat products. This will reduce the total fat content per serve from 29.6g to 15g and save 112.2 kilojoules per serve</p> <p>2. Ditch the lard. Swap the lard for butter to save 15g of total fat per serve. This may change the texture of the quiche slightly but it will reduce the kilojoules </p> <p>3. Use feta. Swap the cheddar cheese for feta cheese, which has fewer kilojoules per gram</p> <p>4. Add extra veggies. This increases the fibre content of the quiche and adds loads of extra nutrients.</p> <p><em>Image credits: Getty Images</em></p> <p><em>This article originally appeared on <a href="https://theconversation.com/coronation-quiche-anyone-youll-need-to-fork-out-a-38-here-are-cheaper-and-healthier-options-204100" target="_blank" rel="noopener">The Conversation</a>. </em></p>

Food & Wine

Placeholder Content Image

King Charles' signature coronation dish mercilessly mocked

<p>With the coronation comes one of the most famed traditions in the Monarchy, the creation of a signature dish, made to be shared and enjoyed across the Commonwealth in honour of the new Monarch.</p> <p>The Queen’s coronation made history in 1953, with the ‘Coronation Chicken’, a recipe that has since embedded itself into British culture.</p> <p>Charles’ crowning marks 70 years since the last coronation, and with the event coming up on May 6, the reveal of the signature dish has been highly anticipated. A culinary delight, like Queen Elizabeth II’s ‘Poulet Reine Elizabeth’, that will make its way down from generation to generation.</p> <p>The Royal Family verified Twitter account shared the long-awaited dish.</p> 
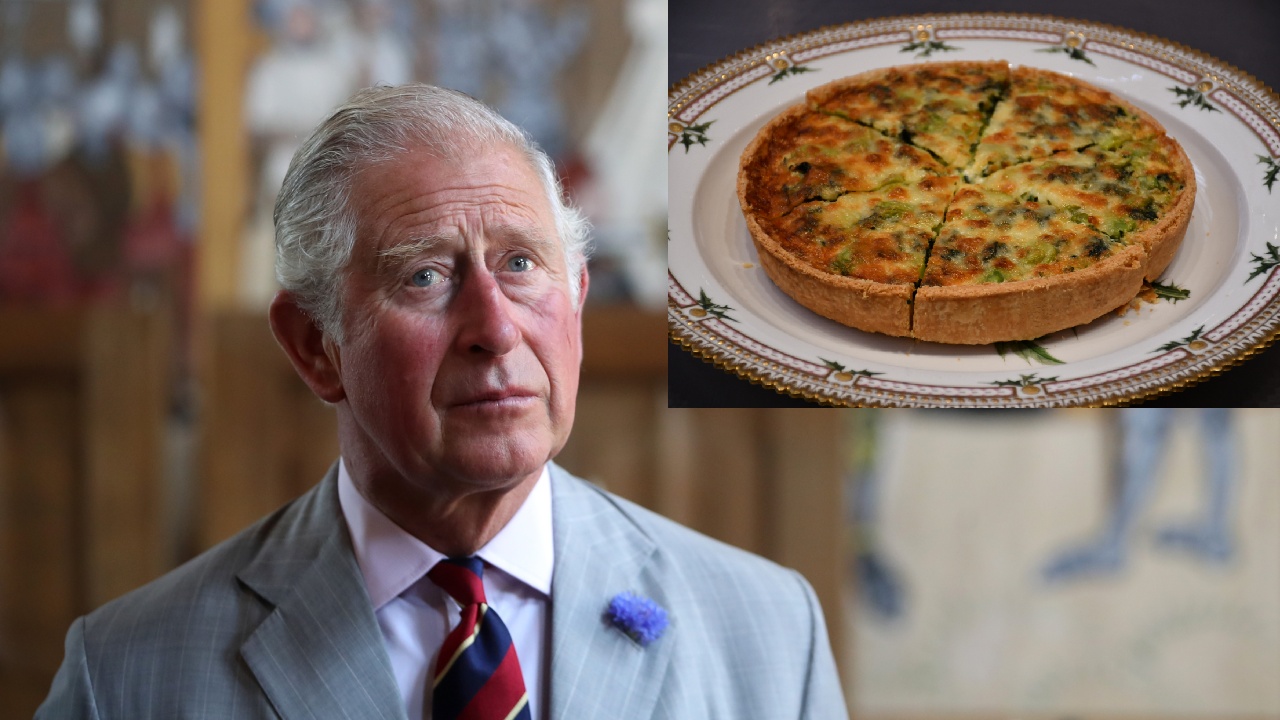
<p>“Introducing… Coronation Quiche!”, the tweet read.</p> <p>“Chosen personally by Their Majesties, The King and The Queen Consort have shared a recipe in celebration of the upcoming #CoronationBigLunch taking place up and down the country.”</p> <blockquote class="twitter-tweet"> <p dir="ltr" lang="en">Introducing… Coronation Quiche!</p> <p>Chosen personally by Their Majesties, The King and The Queen Consort have shared a recipe in celebration of the upcoming <a href="https://twitter.com/hashtag/CoronationBigLunch?src=hash&amp;ref_src=twsrc%5Etfw">#CoronationBigLunch</a> taking place up and down the country. <a href="https://t.co/aVcw9tNarP">pic.twitter.com/aVcw9tNarP</a></p> <p>— The Royal Family (@RoyalFamily) <a href="https://twitter.com/RoyalFamily/status/1647917367798939648?ref_src=twsrc%5Etfw">April 17, 2023</a></p></blockquote> 
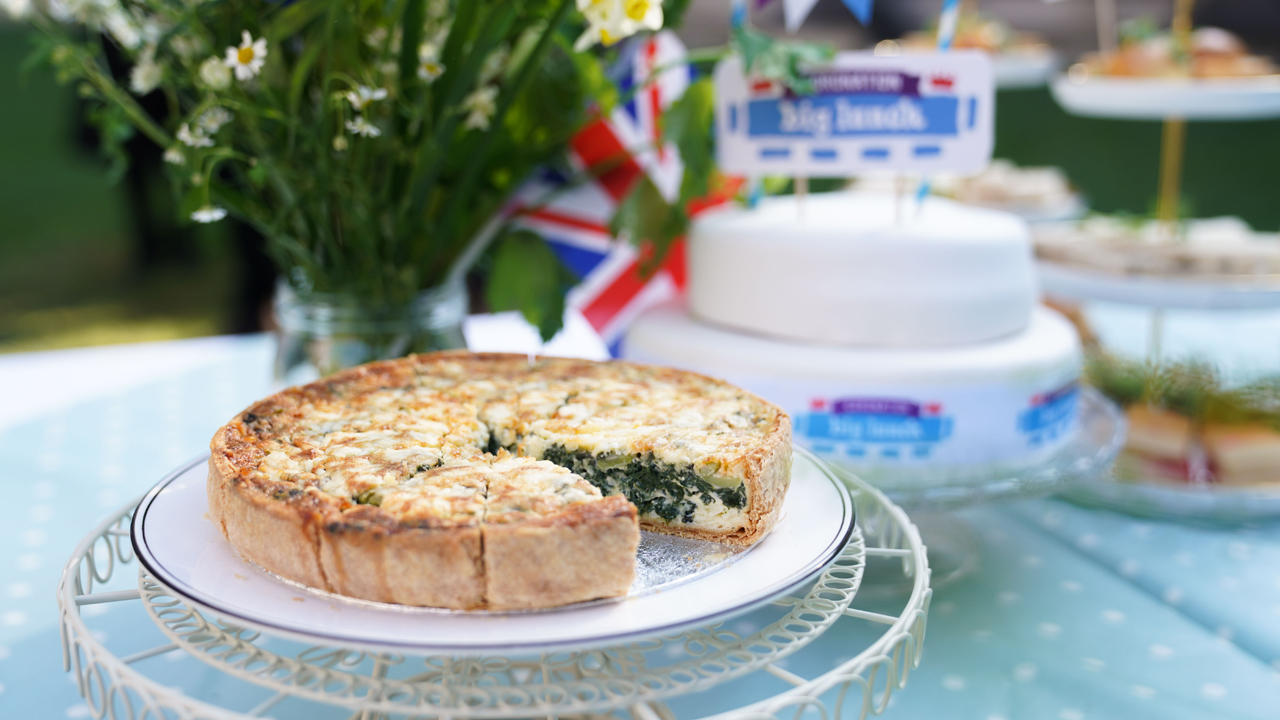
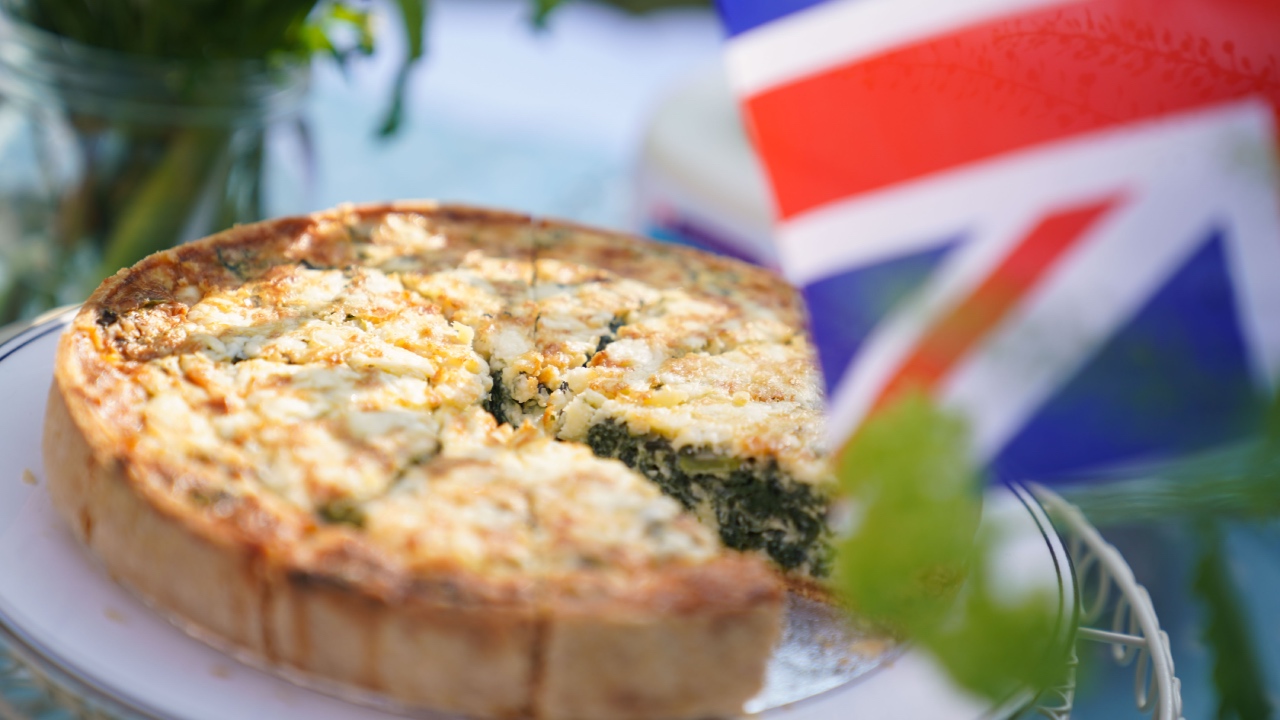
<p>King Charles III has officially unveiled his signature coronation offering, which will be served at the palace’s ‘Big Lunch’ event on May 7, also to be served at several community events and street parties across coronation weekend.</p> <p>The coronation quiche recipe consists of spinach, broad beans, cheese and tarragon, although Buckingham Palace’s chef Mark Flanagan says those who want to bake their own can easily make adjustments to suit their preferences.</p> <p>Charles, Camilla and Flanagan chose the dish because it’s a convenient “sharing” dish that can be served either hot or cold.</p> <p>The coronation quiche has left a bad taste in many individuals’ mouths, going viral online and becoming quite the laughingstock for a few reasons.</p> <p>The most profound stems from the well-known egg shortage in the UK, with production at its lowest in over a decade, according to The Guardian.</p> <p>In 2022, almost a billion fewer eggs were packed compared to 2019 due to producers hit by price hikes and a disastrous outbreak of bird flu.</p> <p>Shoppers calling for supermarkets to stock up on the ingredients for the coronation quiche have posted online to point out the obvious issue.</p> <blockquote class="twitter-tweet"> <p dir="ltr" lang="en">And what are we supposed to make this Coronation Quiche with? <a href="https://t.co/nEmwQGmV0e">pic.twitter.com/nEmwQGmV0e</a></p> <p>— Tavern Hoyden (@TavernHoyden) <a href="https://twitter.com/TavernHoyden/status/1648034778032009219?ref_src=twsrc%5Etfw">April 17, 2023</a></p></blockquote> <blockquote class="twitter-tweet"> <p dir="ltr" lang="en">The UK:</p> <p>- There's a shortage of eggs in the supermarkets.</p> <p>Royal Family:</p> <p>- The "Coronation Quiche".<br /><a href="https://twitter.com/hashtag/CoronationBigLunch?src=hash&amp;ref_src=twsrc%5Etfw">#CoronationBigLunch</a> <a href="https://twitter.com/hashtag/coronationquiche?src=hash&amp;ref_src=twsrc%5Etfw">#coronationquiche</a> <a href="https://t.co/xjEtjiUCuS">pic.twitter.com/xjEtjiUCuS</a></p> <p>— Pauline (@tlnlndn) <a href="https://twitter.com/tlnlndn/status/1648016686937776128?ref_src=twsrc%5Etfw">April 17, 2023</a></p></blockquote> <p>Aside from supply shortages, many people decided the egg pie wasn’t very fitting.</p> <blockquote class="twitter-tweet"> <p dir="ltr" lang="en">whats the matter babe? you've hardly touched your coronation quiche <a href="https://t.co/3FZZwzMEZz">pic.twitter.com/3FZZwzMEZz</a></p> <p>— Jake Johnstone (@hijakejohnstone) <a href="https://twitter.com/hijakejohnstone/status/1648083477693120512?ref_src=twsrc%5Etfw">April 17, 2023</a></p></blockquote> <blockquote class="twitter-tweet"> <p dir="ltr" lang="en">Quiche?? For a coronation?? <a href="https://t.co/rsmwcicgZQ">https://t.co/rsmwcicgZQ</a> <a href="https://t.co/V8aKgf1ZKL">pic.twitter.com/V8aKgf1ZKL</a></p> <p>— local swamp gay 🦝🦨🦉 (@localswampgay) <a href="https://twitter.com/localswampgay/status/1648094906957660161?ref_src=twsrc%5Etfw">April 17, 2023</a></p></blockquote> <blockquote class="twitter-tweet"> <p dir="ltr" lang="en">This is the lamest thing I’ve ever heard. Imagine having 70+ years to think about it and choosing QUICHE. I despair. <a href="https://twitter.com/hashtag/Coronation?src=hash&amp;ref_src=twsrc%5Etfw">#Coronation</a> <a href="https://t.co/jEeXmxP1Ss">https://t.co/jEeXmxP1Ss</a></p> <p>— Julie Lovell (@ficklishjlo) <a href="https://twitter.com/ficklishjlo/status/1648094645669224452?ref_src=twsrc%5Etfw">April 17, 2023</a></p></blockquote> <p>Elizabeth’s coronation saw famed culinary school Le Cordon Bleu London’s creation of the ‘Coronation Chicken’, which consisted of cooked chicken meat in a creamy curry sauce with dried apricots. It was served with a simple salad.</p> <p>When it was first produced the dish came as a surprise due to many of the ingredients not being pantry staples and the country was still under post-war ration restrictions.</p> <p>The chicken dish has evolved over the years, with it now commonly served on a brioche bun and garnished with various trimmings from crisp coconut chips to mangetout and sultanas.</p> <p>Quiche the ‘Coronation Chicken’ goodbye and stay occu-pied with the recipe below.</p> <p>Pastry:</p> <ul> <li>125g plain flour</li> <li>Pinch of salt</li> <li>25g cold butter, diced</li> <li>25g lard</li> <li>2 tablespoons milk</li> <li>Or 1 x 250g block of ready-made shortcrust pastry</li> </ul> <p>Filling:</p> <ul> <li>125ml milk</li> <li>175ml double cream</li> <li>2 medium eggs</li> <li>1 tablespoon chopped fresh tarragon</li> <li>Salt and pepper</li> <li>100g grated cheddar cheese</li> <li>180g cooked spinach, lightly chopped</li> <li>60g cooked broad beans or soya beans</li> </ul> <p>Method:</p> <p>1. To make the pastry: sieve the flour and salt into a bowl; add the fats and rub the mixture together using your finger tips until you get a sandy, breadcrumb-like texture. Add the milk a little at a time and bring the ingredients together into a dough. Cover and allow to rest in the fridge for 30-45 minutes.</p> <p>2. Lightly flour the work surface and roll out the pastry to a circle a little larger than the top of the tin and approximately 5mm thick.</p> <p>3. Line the tin with the pastry, taking care not to have any holes or the mixture could leak. Cover and rest for a further 30 minutes in the fridge.</p> <p>4. Preheat the oven to 190C.</p> <p>5. Line the pastry case with greaseproof paper, add baking beans and bake blind for 15 minutes, before removing the greaseproof paper and baking beans.</p> <p>6. Reduce the oven temperature to 160C.</p> <p>7. Beat together the milk, cream, eggs, herbs and seasoning.</p> <p>8. Scatter half of the grated cheese in the blind-baked base, top with the chopped spinach and beans and herbs, then pour over the liquid mixture.</p> <p>9. If required gently give the mixture a delicate stir to ensure the filling is evenly dispersed but be careful not to damage the pastry case.</p> <p>10. Sprinkle over the remaining cheese. Place into the oven and bake for 20-25 minutes until set and lightly golden.</p> <p><em>Image credits: Getty/Twitter</em></p>

Food & Wine

Placeholder Content Image

A simple delight: Mini fruit tartlets

<p>Serves 8</p> <p>These mini fruit tartlets can be "dressed up" or "dressed down" depending on the situation. <br />Serve with beautiful fresh berries for a dinner party or half a peach or slices of pear or kiwi for a casual cup of afternoon tea. The tarts will travel well in a sealed plastic container and easy are to prepare ahead of time for your next picnic. Here are more ideas on <a href="https://www.wyza.com.au/articles/lifestyle/food-and-wine/how-to-pack-the-perfect-picnic.aspx">how to pack the perfect picnic.</a></p> <p>Recipe as seen on: <a href="http://www.dailygourmet.co.uk/">dailygourmet.co.uk</a></p> <p><strong>Ingredients</strong></p> <p><strong>Shortcrust pastry</strong></p> <ul> <li>200 g plain flour</li> <li>100 g unsalted butter, cut into small cubes</li> <li>3-4 tbsp cold water</li> </ul> <p><strong>Creme patissiere</strong></p> <ul> <li>300 ml semi-skimmed milk</li> <li>1 teaspoon vanilla extract</li> <li>3 egg yolks (free range)</li> <li>2 tbsp plain flour</li> <li>100g caster sugar</li> <li>Tartlets</li> <li>Mixed fruits of your choice (strawberries, blueberries, grapes, etc.)</li> </ul> <p><strong>Directions</strong></p> <p><strong>Pastry</strong></p> <p>1. Sift the flour into a large mixing bowl, add the butter.</p> <p>2. Rub the butter into the flour with your hand, until it starts looking like breadcrumbs, work quickly to prevent the dough becoming warm.</p> <p>3. Add the water slowly to the pastry and mix with a cold knife until it starts forming a dough, you can add more water if the pastry is too dry. </p> <p>4. Wrap the dough in cling film and put into a fridge for 30 minutes. </p> <p>5. Roll it out with a rolling pin.</p> <p><br /><strong>Creme patisserie</strong></p> <p>1. Warm the milk in a small saucepan (don't bring to boil).</p> <p>2. In a large bowl whisk the yolks and sugar, when smooth sift in the flour, combine together.</p> <p>3. Add the warm milk (slowly) to the mixture. Whisk continuously.</p> <p>4. Put the mixture back into the saucepan, gently bring to boil whisking continuously until thick and creamy. Remove from the heat and leave to cool.</p> <p><br /><strong>Tartlets</strong></p> <p>1. Preheat your oven to 180°C (160°C fan assisted).</p> <p>2. Line the pastry in your mini tart tins, prick the base with a fork, put it into the oven and blind-bake it for 12 minutes (to blind-bake it, cover the pastry with baking paper and fill it with baking beans).</p> <p>3. Remove the beans and the paper, bake for another 12 minutes, until the pastry is golden.</p> <p>4. When baked, remove from the oven and put on a wire rack to cool completely.</p> <p>5. Fill the bases with creme patisserie, smooth the surface out with a spoon or spatula.</p> <p>6. Arrange your selection of fresh, sliced fruits on top and serve.</p> <p><em>Republished with permission from <a href="https://www.wyza.com.au/recipes/mini-fruit-tartlets.aspx">com.au.</a></em></p>

Food & Wine

Placeholder Content Image

How to grow petunias in a mini greenhouse

<p>Petunias are popular for adding a splash of winter colour but if you sow them in the garden, frost can kill seedlings as they emerge.  You can nurture the seedlings by growing them indoors until they’re ready to be planted out.</p> <p>To provide the required warmth, shelter and moisture the easiest option is to use a mini greenhouse. This features a tray with a lid that has vents so you can control airflow. </p> <p>For successful germination the soil temperature needs to be 16°C which is easily checked with a thermometer.</p> <p>Sow the seeds in the tray and use a spray bottle to mist the potting mix with water, creating humidity.</p> <p>Replace the lid and position the mini greenhouse in a spot with lots of light but no direct sun. </p> <p><strong>TIP:</strong> Some greenhouses are called propagation units and have a built-in heater to regulate the soil temperature.</p> <p><strong>Plant the seedlings </strong></p> <p>Once your seeds are ready to germinate it's time to plant them. Taking petunias from germination to garden bed takes about six weeks. </p> <p>When the seedlings emerge you can remove the mini greenhouse cover and let the growing medium dry out slightly between waterings.</p> <p>After about 14 to 21 days the seedlings can be transplanted to pots or a windowbox. Lift them carefully out of the growing medium with a stick, being careful not to disturb the roots or let them dry out.</p> <p>The seedlings can be put outside on warm days to acclimatise but make sure they’re protected from direct sun and wind, bringing them back inside at night.</p> <p>To plant them out in the garden, choose a spot with good drainage that gets plenty of light but not harsh afternoon sun and has good airflow. </p> <p>Position petunias about 300mm apart and keep the area weed-free.</p> <p><strong>How to grow petunias in a mini greenhouse</strong></p> <p>Petunias like a moist, well-drained growing medium and the seeds don’t like to be covered in too much soil, so we took the seed cell tray out of the greenhouse and used the base for sowing. </p> <p><strong>TIP:</strong> The seedlings should emerge within a week.</p> <p><strong>Step 1: Add mix</strong></p> <p>Add seed-raising mix to the growing tray then make four 10mm deep rows with a ruler, scattering the seeds then covering with a light dressing of mix.</p> <p><strong>Step 2: Water seeds</strong></p> <p>Water in seeds by misting the mix with water using a spray bottle to settle the seeds in position, covering the growing tray with the lid of the mini greenhouse to keep the humidity high.</p> <p><strong>Step 3: Maintain the seeds</strong></p> <p>Position the greenhouse next to a window that gets morning sun, rotating it every few days so the seedlings grow straight up. Keep the soil moist but not wet.</p> <p><em>Republished with permission of </em><a href="http://www.handyman.net.au/grow-petunias-mini-greenhouse"><em>Handyman Australia</em></a><em>.</em></p>

Home & Garden

Placeholder Content Image

The Queen's mini-me! Palace celebrates as Princess Charlotte turns 4

<p>Princess Charlotte and her family are celebrating her fourth birthday today, May 2, by sharing three new adorable portraits of the little royal.</p> <p>In the happy snaps, the princess looks strikingly similar to her great-grandmother, The Queen.</p> <p>The stunning portraits, taken by none other than Charlotte's mum, the Duchess of Cambridge, at the family’s country estate Anmer Hall, shows the playful royal happily running around the grounds of her home.</p> <p>In two images, the young royal member is wearing a plaid dress with a simple grey cardigan – an outfit once worn by Queen Elizabeth when she herself was a young princess.</p> <p>The portrait taken in 1936 shows a happy Princess Elizabeth with her sister, Princess Margaret, in matching plaid skirts with sweaters as the play gleefully with a family corgi dog.</p> <p>The Queen has a special place in her heart for plaid it seems as it has remained a constant pattern she has worn again and again over the years on numerous occasions.</p> <p>The similarities do not end in plaid though as it seems the two royal members over two generations apart have a love for floral as well.</p> <p>In the third image of Princess Charlotte, she is pictured sitting in the grounds of her royal home while she poses for the camera in a blue floral print dress with a white collar.</p> <p>The Queen adorned a similar outfit when she was a little tyke herself and was pictured wearing a strikingly similar dress to her great-granddaughter in 1936.  </p> <p>The little royal, who is fourth in line to the throne, has proven alongside her great-grandmother that style does not need to come with age.</p> <p>Scroll through the gallery above to see just how alike Princess Charlotte and the Queen look.</p> <p> </p>

Art

Placeholder Content Image

No-bake mini blueberry cheesecakes

<p>Love dessert but hate baking? These no-bake mini blueberry cheesecakes are the dessert you’ve been waiting for.</p> <p><strong><span style="text-decoration: underline;">Ingredients:</span></strong></p> <ul> <li>1 cup of digestive biscuit crumbs</li> <li>4 ½ tablespoons of butter</li> <li>2 tablespoons of cold water</li> <li>1 ½ teaspoons of powdered gelatin, unflavoured</li> <li>2/3 cup of heavy cream</li> <li>225g of cream cheese</li> <li>¾ cup of powdered sugar</li> <li>¼ cup of sour cream</li> <li>1 ½ teaspoons of vanilla extract</li> <li>Extra blueberries for garnish</li> </ul> <p><em>Sauce</em></p> <ul> <li>1/3 cups of sugar</li> <li>2 ½ teaspoons of cornflour</li> <li>¼ cup of water</li> <li>1 tablespoon of lemon juice</li> <li>2 cups of blueberries</li> <li>1 tablespoon of butter</li> </ul> <p><strong><span style="text-decoration: underline;">Method: </span></strong></p> <ol> <li>With aluminium foil, line a 20cm by 20cm baking dish (or for round cakes, as shown, use individual round baking dishes) leaving five-cm of foil overhanging and spray with cooking spray.</li> <li>In a bowl, mix together digestive biscuits and butter until thoroughly combined.</li> <li>Pour into dish and press to bottom, creating a base layer. Let chill.</li> <li>In a small bowl, sprinkle gelatin over water and let rest.</li> <li>In a separate bowl, whisk or electric mix heavy cream until heavy peaks form.</li> <li>In another bowl, mix cream cheese and powdered sugar, whipping until smooth.<br />  </li> <li>Add sour cream and vanilla.</li> <li>Take gelatin mixture and microwave for 25 seconds. Whisk until dissolved and let cool for less than three minutes.</li> <li>While mixing, pour gelatin into cream cheese mix. Add whipped cream and combine.</li> <li>Take cream cheese mix and spread it over the biscuit layer.</li> <li>Cover and chill for three hours. Cut into squares or remove from individual baking dishes.</li> <li>To make the sauce, in a saucepan mix together sugar and cornflour. Add water, lemon juice and blueberries.</li> <li>Cook over medium-high heat, bringing the mixture to a boil, stirring often.</li> <li>Once thickened, add butter and stir.</li> <li>Let cool and pour atop cheesecake. Garnish with fresh blueberries.</li> </ol> <p><strong>Related links:</strong></p> <p><span style="text-decoration: underline;"><em><strong><a href="/lifestyle/food-wine/2015/08/new-york-cheesecake/">New York cheesecake</a></strong></em></span></p> <p><span style="text-decoration: underline;"><em><strong><a href="/lifestyle/food-wine/2015/08/red-velvet-cheesecake-bars/">Red velvet cheesecake bars</a></strong></em></span></p> <p><span style="text-decoration: underline;"><em><strong><a href="/lifestyle/food-wine/2015/05/berry-cheesecake-slice/">Blackcurrant and raspberry cheesecake slice</a></strong></em></span></p>

Food & Wine

Placeholder Content Image

Broccoli quiche

<p>Hearty and healthy, this broccoli quiche is packed full of wholesome goodness and has plenty of flavour to boot.</p> <p><strong><span style="text-decoration: underline;">Serves:</span></strong> 6</p> <p><strong><span style="text-decoration: underline;">Ingredients:</span></strong></p> <ul> <li>20g butter</li> <li>2 leeks, white part only, washed and thinly sliced</li> <li>300ml cream</li> <li>3 eggs</li> <li>2 egg yolks</li> <li>1/2 cup grated cheddar</li> <li>250g broccoli, cut into florets</li> <li>1 ¼ cups plain flour</li> <li>¼ cup polenta</li> <li>125g chilled butter, chopped</li> <li>1 egg</li> <li>2 teaspoons cold water</li> </ul> <p><strong><span style="text-decoration: underline;">Method:</span></strong></p> <p>1. To make the pastry, process flour, polenta and butter in a food processor until the mixture resembles breadcrumbs. Add egg and water and process until dough forms. Shape into a circle and wrap in plastic wrap. Place in the refrigerator for 20 minutes.</p> <p>2. Meanwhile, in a frying pan on medium heat, melt butter. Cook leek for five to eight minutes, stirring, until softened but not brown. Set aside to cool.</p> <p>3. Grease a loose-based tart tin. Roll pastry on a lightly floured surface until three-mm thick. Ease into prepared tin. Trim edges and prick the base with a fork. Chill for 10 minutes.</p> <p>4. Preheat oven to 200°C. Line pastry with baking paper and fill with rice (or pastry weights). Blind bake for 15 minutes. Remove paper and rice (or weights) and bake for another five minutes, until pastry is dry.                    </p> <p>5. To make filling, whisk together cream, eggs and egg yolks. Season. Spread leek over pastry shell. Scatter over half of the cheddar and then the broccoli. Carefully pour over the egg mixture and top with remaining cheddar. Bake for 10 minutes. Reduce oven to 180°C (or 160°C fan) and bake for another 30 minutes or until set. Serve warm. </p> <p><strong>Related links:</strong></p> <p><span style="text-decoration: underline;"><em><strong><a href="/lifestyle/food-wine/2014/12/quiche-lorraine/">Quiche Lorraine</a> </strong></em></span></p> <p><span style="text-decoration: underline;"><em><strong><a href="/lifestyle/food-wine/2015/01/mini-smoked-salmon-quiches/">Mini smoked salmon and parsley quiches</a></strong></em></span></p> <p><span style="text-decoration: underline;"><em><strong><a href="/lifestyle/food-wine/2015/01/mushroom-feta-and-spinach-quiche/">Mushroom, feta and spinach quiche</a></strong></em></span></p>

Food & Wine

Placeholder Content Image

Julie Goodwin’s salmon quiche

<p>This salmon quiche is the perfect mid-week meal. Packed with protein and easy to make, the leftovers (if you can manage to save any) make the perfect next-day lunch.</p> <p><strong><span style="text-decoration: underline;">Serves</span>:</strong> 10–12</p> <p><strong><span style="text-decoration: underline;">Ingredients:</span></strong></p> <ul> <li>1 quantity savoury shortcrust pastry or two sheets plain frozen shortcrust (if you have it in the freezer)</li> <li>1 cup grated mozzarella cheese</li> <li>50 g baby spinach leaves</li> <li>400 g skinless, boneless salmon fillet, cut into 2 cm cubes</li> <li>1 bunch shallots (spring onions), finely sliced</li> <li>1 bunch dill, leaves chopped</li> <li>10 eggs</li> <li>½ cup cream</li> <li>½ teaspoon salt</li> <li>¼ teaspoon pepper</li> </ul> <p><strong><span style="text-decoration: underline;">Method:</span></strong></p> <ol> <li>Preheat the oven to 170°C. Grease a 26 cm loose-based flan tin with butter or spray oil. Lay the pastry into the flan tin and trim the edges. Prick the pastry with a fork. Place a sheet of baking paper over the pastry and fill with pastry weights or rice. Bake for 15 minutes or until starting to turn golden. Remove from the oven and take out the weights and paper.</li> <li>Arrange half the mozzarella cheese evenly over the base of the pastry case. Arrange the spinach over the top, followed by the salmon cubes, then scatter with the shallots and half of the dill leaves.</li> <li>In a bowl, beat the eggs then add the cream and beat well. Season with salt and pepper. Carefully pour the egg mixture into the pastry case and top with the remaining mozzarella.</li> <li>Bake for 25 minutes or until golden brown on top and just firm in the middle. Remove from the oven and set aside to cool a little before serving.</li> </ol> <p><img width="155" height="213" src="https://oversixtydev.blob.core.windows.net/media/37783/julie-goodwin-cover_155x213.jpg" alt="Julie Goodwin Cover" style="float: right;"/></p> <p><em>Recipe courtesy of Julie Goodwin’s</em> Essential Cookbook<em> ($39.99), published by Hachette Australia.</em></p>

Food & Wine

Placeholder Content Image

How to create your own mini garden

<p>Earlier this year I was asked to decorate a doll’s house for a charity auction. I loved it so much and spent way too much time re-covering tiny sofas, making tiny cushions and a tiny balsa-wood bookshelf with tiny versions of my books sitting on the shelves. Things got a tiny bit out of control! If I didn’t have a deadline to get it finished, I would have spent all my time on it. I could have happily made it my new career.</p> <p>Once the doll’s house went off to its new home, I realised a few things: 1. The seven-year-old child inside of me is still alive and well. 2. I’ve never gotten over my love for all things miniature. 3. There was a giant hole left in my life where the doll’s house project had been … So, I moved on to the next miniature thing I could get my hands on – a miniature garden. I made this at home, and Ari loved it so much he made one as well. It’s a really great project to do with kids.</p> <p><strong><span style="text-decoration: underline;">You will need:</span></strong></p> <ul> <li>pencil and paper</li> <li>a large vessel (I used a large enamel baking dish that I bought from an op shop and drilled holes in the bottom for drainage)</li> <li>a variety of small plants with varying heights, colours and widths (work out if your garden will be inside/outside/in the shade/full sun, and buy plants accordingly – bonsai plants can work well)</li> <li>potting mix</li> <li>small trowel</li> <li>a variety of mosses (I gathered moss from the alleyways behind my house and kept it very moist and in a dark spot until I needed it)</li> <li>rocks for stepping-stone path</li> <li>pebbles (I used 2 different sizes: very small and tiny)</li> <li>12–15 toothpicks for fence</li> <li>scraps of fabric and small twigs for tepee</li> </ul> <p><strong><span style="text-decoration: underline;">Method:</span></strong></p> <p>1. Draw out a loose plan for your mini garden. Decide where the different plants will sit, how the path will work, where the small pebbles will go and where the teepee will sit.</p> <p>2. Pot the larger plants in the vessel first, adding extra potting mix under and around the plants as needed.</p> <p style="text-align: center;"><img width="498" height="360" src="https://oversixtydev.blob.core.windows.net/media/37084/step-2_498x360.jpg" alt="Step 2 (1)"/></p> <p><span style="text-align: center;">3. If you are using moss, gently press it into the dirt around the plants, remembering to leave space for the path.</span></p> <p>4. Using the rocks, make a stepping-stone path.</p> <p>5. Add the small and tiny pebbles around the path and any areas around the plants and moss where the dirt is showing.</p> <p>6. To make the fence, stick the toothpicks into the dirt. Trim the length of the toothpicks if required. Place the toothpicks in a line, spacing them fairly close together so they resemble a fence.</p> <p>7. To make the teepee, break or cut three twigs so they are even in length. Wind a thin strip of fabric around the top of the twigs to hold them in place.</p> <p style="text-align: center;"><img width="498" height="360" src="https://oversixtydev.blob.core.windows.net/media/37087/step-7_498x360.jpg" alt="Step 7 (2)"/></p> <p>8. Cut a piece of fabric and wrap it around the twigs to create a cover. Secure the fabric in place by tying a strip of fabric around the top. Trim the fabric as required. Place the teepee in the garden by gently pressing the twigs into the moss and dirt.</p> <p><img width="146" height="170" src="https://oversixtydev.blob.core.windows.net/media/37089/sunshine-spaces-cvr_146x170.jpg" alt="Sunshine Spaces CVR (3)" style="float: right;"/></p> <p><em>Image credit: Chris Middleton</em></p> <p><em>This is an edited extract from</em> Sunshine Spaces<em> by Beci Orpin published by Hardie Grant Books RRP $39.99 and is available in stores nationally.</em></p> <p> </p>

Home & Garden

Placeholder Content Image

Gluten-free mini caramel tarts

<p>These mini caramel tarts are not only delicious but will also help you out if you need to serve up a yummy dessert for different diets. Dairy-free, gluten-free and vegan this treat will be a crowd pleaser for everyone.</p> <p><strong><span style="text-decoration: underline;">Makes:</span></strong> 12 mini tarts</p> <p><strong><span style="text-decoration: underline;">Ingredients:</span></strong></p> <p><em>Base</em></p> <ul> <li>40 g raw sunflower kernels</li> <li>60 g raw almonds</li> <li>200 g gluten-free plain flour</li> <li>½ teaspoon psyllium husk powder</li> <li>1 teaspoon ground cinnamon</li> <li>125 g coconut oil, solid</li> <li>55 g coconut sugar</li> <li>½ teaspoon vanilla extract</li> <li>85 g coconut yoghurt</li> </ul> <p><em>Caramel</em></p> <ul> <li>240 g coconut sugar</li> <li>520 g tinned coconut cream</li> <li>60 g coconut oil</li> <li>1 tablespoon cornflour</li> <li>30 ml plant-based milk</li> <li>1 teaspoon ground sea salt</li> <li>2 teaspoons vanilla extract</li> </ul> <p><em>Topping</em></p> <ul> <li>80 g vegan milk chocolate melted</li> </ul> <p><strong><span style="text-decoration: underline;">Notes: </span></strong></p> <ul> <li>You can replace the cornflour with arrowroot starch if you’re avoiding corn.</li> <li>You can also replace the coconut yoghurt in this recipe with Greek yoghurt if dairy isn’t your enemy.</li> </ul> <p><strong><span style="text-decoration: underline;">Method: </span></strong></p> <p>1. Pulse the sunflower kernels and almonds in a food processor until finely chopped. Add the flour, psyllium husk powder, cinnamon, cold coconut oil and coconut sugar. Process until the mixture resembles fine breadcrumbs.</p> <p>2. Add the vanilla and coconut yoghurt. Process until the mixture starts to come together to form a smooth dough. Turn the mixture out onto a large piece of plastic wrap, shape into a disc and cover with plastic wrap. Refrigerate for 1 hour to rest.</p> <p>3. For the caramel, mix the coconut sugar, coconut cream, coconut oil, cornflour, milk and salt in a medium saucepan over a low heat. Whisk until the sugar has dissolved. Bring the mixture to a simmer and cook for 10–15 minutes, stirring frequently, until thickened.</p> <p>4. Remove from the heat, then add the vanilla, mixing well. Set aside to cool for 15 minutes.</p> <p>5. Preheat the oven to 180°C (160°C fan forced/350°F). Lightly brush a 12-hole standard muffin tin with coconut oil.</p> <p>6. Divide the dough into 12 equal portions, then evenly press into the muffin holes, covering the base and sides.</p> <p> </p> <p>7. Fill each tart base with two teaspoons of the caramel and smooth the surface. Bake for 20–30 minutes or until the tart cases are golden and set.</p> <p>8. Remove from the oven and set aside to cool in the tin for 30 minutes. Drizzle each tart with melted chocolate and refrigerate for 2 hours. Remove from the muffin tin and serve. Will keep in an airtight container in the fridge for up to 3 days.</p> <p><img width="125" height="174" src="https://oversixtydev.blob.core.windows.net/media/36015/the-healthy-convert-cvr_125x174.jpg" alt="The Healthy Convert CVR" style="float: right;"/></p> <p> </p> <p><em>This is an edited extract from The Healthy Convert by Nicole Maree published by Hardie Grant Books RRP $24.99 and is available in stores nationally.</em></p> <p><strong><em>Have you ordered your copy of the Over60 cookbook, The Way Mum Made It, yet? Featuring 175 delicious tried-and-true recipes from you, the Over60 community, and your favourites that have appeared on the Over60 website, <span style="text-decoration: underline;"><a href="https://shop.abc.net.au/products/way-mum-made-it-pbk" target="_blank">head to the abcshop.com.au to order your copy now.</a></span></em></strong></p>

Food & Wine

Placeholder Content Image

Severe thunderstorm and mini tornado damage Sydney properties

<p>A severe thunderstorm and mini tornado that struck Sydney on Wednesday afternoon has caused damage to many Sydney properties.</p> <p>The State Emergency Service received more than 300 calls for assistance due to ripped off roofs and fallen trees.</p> <p>Some Sydneysiders even called in because their trampolines had blown onto their roofs.</p> <p>The thunderstorm also left more than 35,000 homes without power and some traffic lights were out in peak hour traffic.</p> <p>The streets of Paramatta and Picton were hit by flash flooding as people tried to navigate the roads and make their way home.</p> <p>Public transport was also impacted all over Sydney as Paramatta Weir overflowed and buses were forced to replace ferries in some areas of Sydney.</p> <p>Sydney residents can expect little relief from the rain with the weather expected to continue throughout winter.</p> <p>Weatherzone meteorologist Rob Sharpe said, “Autumn is one of the wettest times of the year but what has been unusual is how many days of rain there have been already in March – almost every day has seen showers,' he said.</p> <p>“It has been quite a bit wetter than usual along the New South Wales coast.”</p> <p>“The reason why it's been so wet is because there has been a very high pressure system sitting in the Tasman Sea for the vast majority of the past three weeks. We've had lots of low pressure systems which haven't been moving as easily and frequently. But for the next few months, we are more likely to have these fronts move along the south of the country more freely.”</p> <p><em>Image credit; NSW Ambulance via Twitter</em></p>

News

Placeholder Content Image

Mini lamos

<p>Our mini lamos use components of the traditional lamington – think a raspberry mousse, a layer of chocolate and a dousing of desiccated coconut. For this perfect bite-size treat, we use coconut and cacao to create a delicious mousse texture. You can top with fresh raspberries for extra zing.</p> <p><strong><span style="text-decoration: underline;">Makes:</span></strong> approximately 15</p> <p><strong><span style="text-decoration: underline;">Ingredients:</span></strong></p> <p><em>For the raspberry jam</em></p> <ul> <li>150 g fresh or frozen raspberries</li> <li>40 ml rice malt syrup</li> <li>Zest and juice of ½ lime</li> <li>2 tablespoons chia seeds</li> <li>45 g fresh raspberries</li> </ul> <p><em>For the ganache</em></p> <ul> <li>170 g fresh or frozen raspberries</li> <li>60 ml coconut oil</li> <li>150 g cashews, soaked</li> <li>90 ml coconut nectar</li> <li>4 tablespoons cacao powder</li> <li>1 vanilla bean, split lengthways and seeds scraped</li> <li>Pinch of Himalayan pink salt</li> </ul> <p><em>To serve</em></p> <ul> <li>Dessicated coconut</li> <li>3 × 45 g bars of Pana Chocolate Raw Cacao, optional (if you would prefer not to dip in chocolate, the coconut will stick to the ganache)</li> <li>1 teaspoon coconut oil</li> </ul> <p><strong><span style="text-decoration: underline;">Method:</span></strong></p> <p><em>For the raspberry jam</em></p> <ol> <li>Defrost the raspberries, if necessary.</li> <li>Blend the raspberries in a high-speed blender with the rice malt syrup and lime zest and juice until smooth.</li> <li>Pour the mixture into a bowl and fold the chia seeds through.</li> <li>Allow to thicken in the fridge for 2 hours, then fold the fresh raspberries through.</li> </ol> <p><em>For the raspberry chocolate ganache</em></p> <ol> <li>Blend the raspberries in a high-speed blender until smooth, then strain to remove the seeds and set aside.</li> <li>Melt the coconut oil over a bain-marie.</li> <li>Blend the cashews in a food processor, scraping down the sides regularly, until the oils are released and the mixture has achieved a butter-like consistency.</li> <li>Return the raspberry purée to the blender along with the cashew butter and all remaining ingredients except the coconut oil.</li> <li>Blend the mixture until smooth, then add the melted coconut oil and blend the mixture again.</li> <li>Pour the ganache into the cake or brownie tin. For perfectly square bites, the mixture should reach approximately 2.5 cm up the side.</li> <li>Set in the freezer, then turn the ganache out onto a cutting board and portion it into 2.5 × 2.5 cm pieces.</li> <li>Use a chopstick to make a hole in the centre of each piece, being careful not to poke through the bottom. Twist the chopstick gently to make the hole a little larger.</li> <li>Place the ganache onto a tray and into the fridge until you are ready to assemble your mini lamos.</li> </ol> <p><em>To assemble</em></p> <ol> <li>Pipe raspberry jam into the hole in each ganache square until full.</li> <li>Fill a bowl with desiccated coconut.</li> <li>Melt the chocolate over a bain-marie.</li> <li>Add a little coconut oil (approximately 1 teaspoon) to the chocolate to give it an extra smooth consistency.</li> <li>Using a fork, dip each ganache square into the chocolate.</li> <li>Tap the fork against the bowl to remove the excess chocolate, then drop the ganache square into the coconut.</li> <li>Shake the bowl to cover the square completely in coconut.</li> <li>Repeat for all squares, then refrigerate until needed.</li> </ol> <p><img width="195" height="194" src="https://oversixtydev.blob.core.windows.net/media/33982/pana-chocolate-cvr_195x194.jpg" alt="Pana Chocolate CVR" style="float: right;"/></p> <p><em>This is an edited extract from Pana Chocolate, The Recipes by Pana Barbounis published by Hardie Grant Books RRP $36 and is available in stores nationally. Photographer: © Armelle Habib.</em></p> <p><em><strong>Have you ordered your copy of the Over60 cookbook, The Way Mum Made It, yet? Featuring 178 delicious tried-and-true recipes from you, the Over60 community, and your favourites that have appeared on the Over60 website, <span style="text-decoration: underline;"><a href="https://shop.abc.net.au/products/way-mum-made-it-pbk" target="_blank">head to the abcshop.com.au to order your copy now</a></span>.</strong></em></p> <p><strong>Related links:</strong></p> <p><a href="http://www.oversixty.co.nz/lifestyle/food-wine/2016/07/mini-apple-pies/"><span style="text-decoration: underline;"><em><strong>Mini apple pies</strong></em></span></a></p> <p><a href="http://www.oversixty.co.nz/lifestyle/food-wine/2016/06/layered-chocolate-cream-pavlova/"><span style="text-decoration: underline;"><em><strong>Layered chocolate cream pavlova</strong></em></span></a></p> <p><a href="http://www.oversixty.co.nz/lifestyle/food-wine/2016/05/mini-banoffee-pies/"><span style="text-decoration: underline;"><em><strong>Mini banoffee pies</strong></em></span></a></p>

Food & Wine

Placeholder Content Image

Mini meringue pies

<p>We love these bite-size treats with crunchy biscuit casing, zesty lemon curd and a soft coconut cream meringue top. The lemon curd filling is versatile – we use it for raw dessert cake layers and even individual chocolate fillings. Experiment with alternate citrus flavours if you like – limes or oranges also work well.</p> <p><strong><span style="text-decoration: underline;">Makes:</span></strong> 11 mini tarts</p> <p><strong><span style="text-decoration: underline;">Ingredients:</span></strong></p> <p>For the chocolate tart shell</p> <ul> <li>50 g wet nut milk pulp</li> <li>1 tablespoon desiccated coconut</li> <li>1 tablespoon coconut sugar</li> <li>1 tablespoon cacao powder</li> </ul> <p>For the lemon curd</p> <ul> <li>60 ml coconut oil</li> <li>40 cashews, soaked</li> <li>80 ml rice malt syrup</li> <li>Juice and zest of 1 large lemon</li> <li>Pinch of Himalayan pink salt</li> <li>Pinch of ground turmeric</li> </ul> <p>For the coconut cream meringue</p> <ul> <li>400 ml coconut cream</li> <li>1 tablespoon coconut oil</li> <li>1 teaspoon rice malt syrup</li> <li>coconut sugar, for sprinkling</li> </ul> <p><strong><span style="text-decoration: underline;">Method:</span></strong></p> <p>For the chocolate tart shell</p> <ol> <li>Using your hands, massage all ingredients together in a small bowl.</li> <li>Divide the mixture into eleven equal portions and press into the tart tins, then freeze for 15 minutes. Once the shells are frozen, pop them out of the moulds and place on a mesh dehydrator tray. Dehydrate at 40°C for 12–24 hours.</li> <li>Allow to cool.</li> </ol> <p>For the lemon curd</p> <ol> <li>Melt the coconut oil over a bain-marie.</li> <li>Blend all the ingredients except the coconut oil in a high-speed blender until smooth.</li> <li>Add the coconut oil and blend until very smooth.</li> <li>Pour equal portions of the mixture into each tart shell and set in the fridge for 30 minutes.</li> </ol> <p>For the coconut cream meringue</p> <ol> <li>Refrigerate the coconut cream overnight.</li> <li>Melt the coconut oil over a bain-marie.</li> <li>Scoop the solid cream off the top of the coconut cream and place the solid cream in a chilled bowl (discard the leftover water). Add the rice malt syrup and whisk to combine.</li> <li>While whisking, pour the coconut oil into the cream, continuing to whisk so the oil sets evenly.</li> <li>Transfer the mixture to a piping bag and pipe a little meringue onto the top of each tart.</li> <li>Sprinkle a tiny bit of coconut sugar over each meringue.</li> <li>Refrigerate until needed, or serve immediately.</li> </ol> <p style="text-align: center;"><img width="224" height="223" src="https://oversixtydev.blob.core.windows.net/media/33868/pana-chocolate-cover_224x223.jpg" alt="Pana Chocolate Cover" style="float: right;"/></p> <p style="text-align: left;"><em>This is an edited extract from Pana Chocolate, The Recipes by Pana Barbounis published by Hardie Grant Books RRP $36 and is available in stores nationally. Photographer: Armelle Habib.</em></p> <p><em><strong>Have you ordered your copy of the Over60 cookbook, The Way Mum Made It, yet? Featuring 175 delicious tried-and-true recipes from you, the Over60 community, and your favourites that have appeared on the Over60 website, <span style="text-decoration: underline;"><a href="https://shop.abc.net.au/products/way-mum-made-it-pbk" target="_blank">head to the abcshop.com.au to order your copy now</a></span>.</strong></em></p> <p><strong>Related links:</strong></p> <p><a href="http://www.oversixty.co.nz/lifestyle/food-wine/2016/07/mini-apple-pies/"><span style="text-decoration: underline;"><em><strong>Mini apple pies</strong></em></span></a></p> <p><a href="http://www.oversixty.co.nz/lifestyle/food-wine/2016/06/layered-chocolate-cream-pavlova/"><span style="text-decoration: underline;"><em><strong>Layered chocolate cream pavlova</strong></em></span></a></p> <p><a href="http://www.oversixty.co.nz/lifestyle/food-wine/2016/05/mini-banoffee-pies/"><span style="text-decoration: underline;"><em><strong>Mini banoffee pies</strong></em></span></a></p>

Food & Wine